See the images below for an overview of the Starfish workflows based on the flag raised.
To see the automated email templates sent to students based on the flag raised, see the following link: Starfish Flag Automated Email Templates
Academic Flag

Danger of Failing Flag

Kudos

Behavior/Mental/Physical Health Flag

Transfer Out Flag

Non-Academic Concern/Hopkins 360 Flag

To Raise a Flag Inside a Progress Survey:
Option 1
1. On the home page, select “Outstanding Progress Surveys” at the top.

2. You may need to select the survey for the current semester from the drop-down menu.
3. Once in the open survey, your list of students will populate alphabetically by last name.
4. Click the appropriate flag to raise, if any. Add any notes and select “SUBMIT” at the bottom of the page.

Option 2
1. Select the three lines at the top left of your Starfish home screen.

2. Select “My Students” in the menu that slides out.
3. A list of your students will populate alphabetically by last name.
4. You can either select the student you would like to raise the flag for (3A) or search for the student by name or connection (3B)

5. Hover over the student’s name.Select the “Flag” button directly under the student’s name.
6. Select the flag type, enter the course content, and write comments that would help clarify the reason the flag was raised.

How to log in
-
- To access Starfish, log in to Canvas.
- Enter your course from the Canvas Dashboard.
- Starfish is linked in the course navigation menu on the left side of the window.
- Click on the Starfish link to access Starfish.
- Use the other course navigation menu items on the left side of the window to return to your course content.

If you do not see a link for Starfish in your course navigation menu, you can access Starfish directly by going to https://t.jh.edu/starfish.
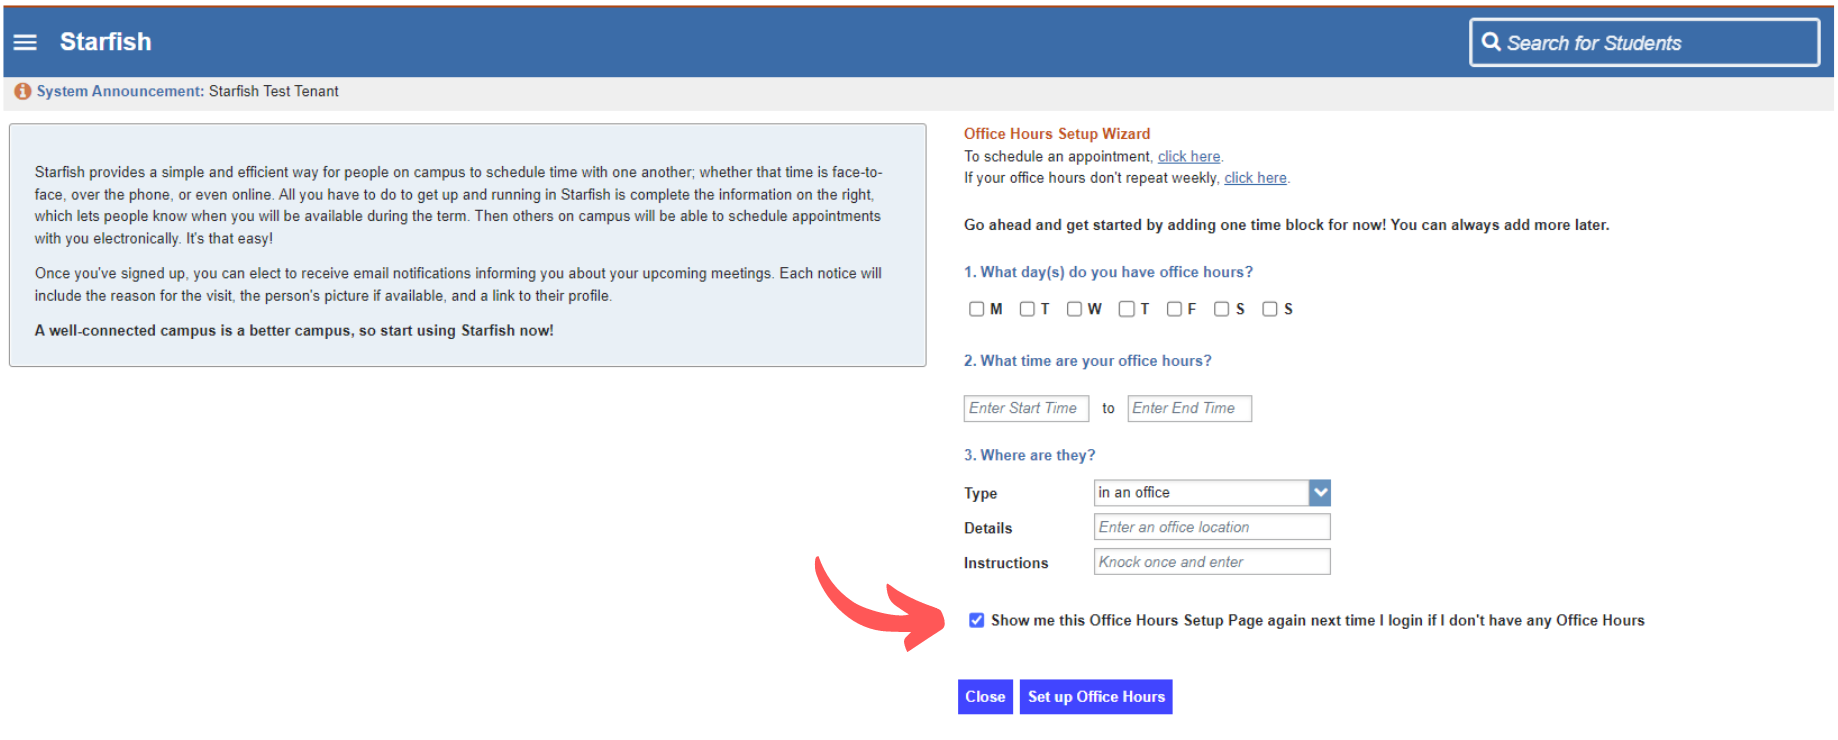
How to remove the office hours set up from the home page when you log in:
To remove the office hours set up from the home page when you log in, simply uncheck the box next to “Show me this Office Hours Setup Page again next time I login if I don’t have any Office Hours.”


