JHU’s VoiceThread browser-based platform transitions to the New VoiceThread in Summer 2024. See Overview of the New VoiceThread for some of the features we want you to learn about plus some additional resources to learn more.
VoiceThread is web-based presentation software that allows users to create and share interactive multimedia slideshows. VoiceThread presentations are used to showcase audio, video, images, and documents while allowing users to comment on them in a variety of ways. The result is an ongoing, asynchronous, digital conversation that can be easily shared with individuals, groups, and/or embedded into different websites.
- Logging In
- Navigating the Site
- Navigating a VoiceThread Presentation
- Setting Up your Microphone
- VoiceThread How-to Documentation
Logging In
You can also access VoiceThread in Canvas via its integration for Canvas courses.
Navigating the Site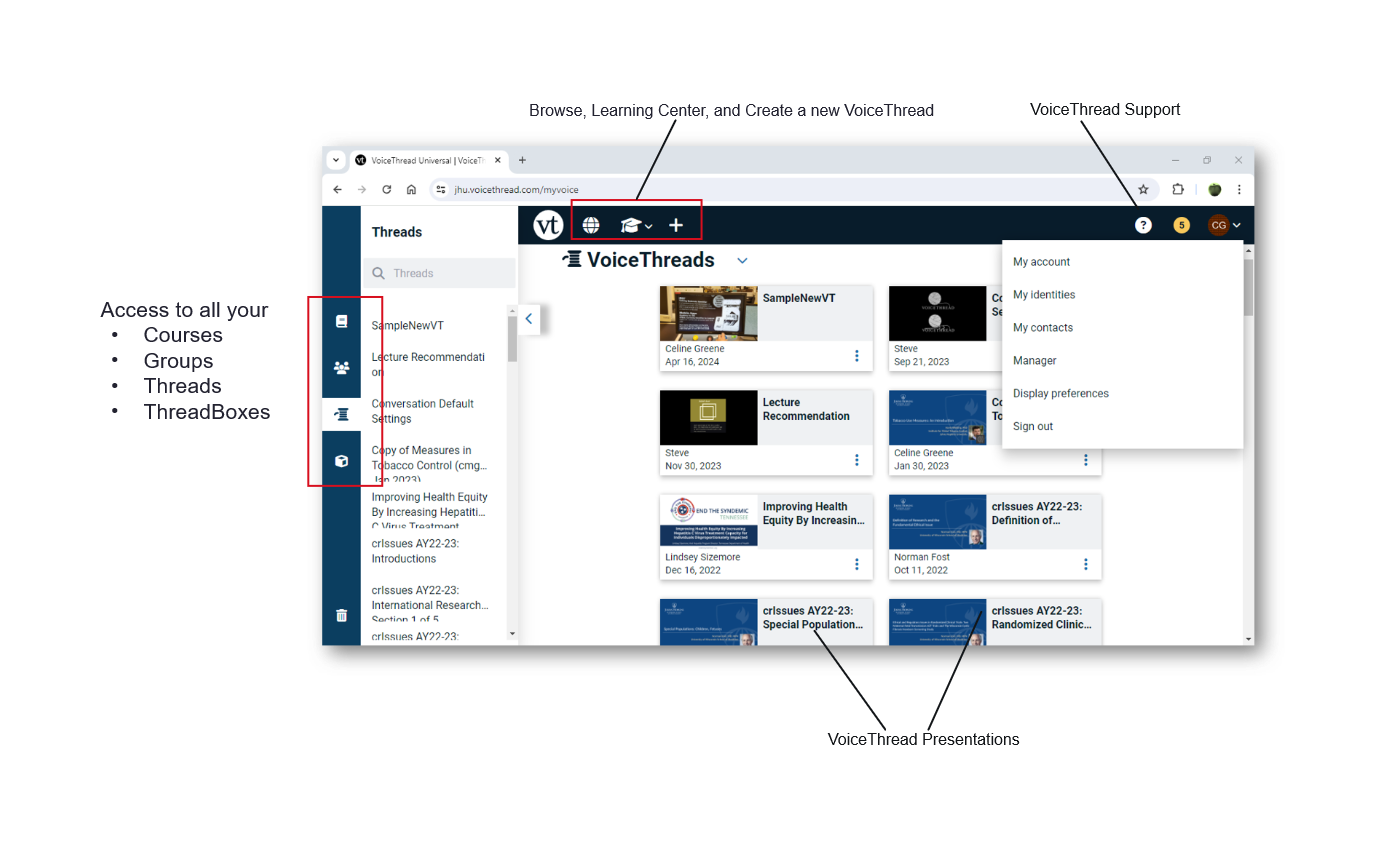
Browse (top): Browse publicly available VoiceThreads
Learning Center (top): Case studies, research, blog, tutorials, etc.
Create a new VoiceThread (top): Create and edit your VoiceThreads
VoiceThread Support (top right): you can find a link to get help with VoiceThread
Courses, Groups, Threads, ThreadBoxes (left): Access to all your Courses, Groups, Threads and ThreadBoxes
Navigating a VoiceThread Presentation
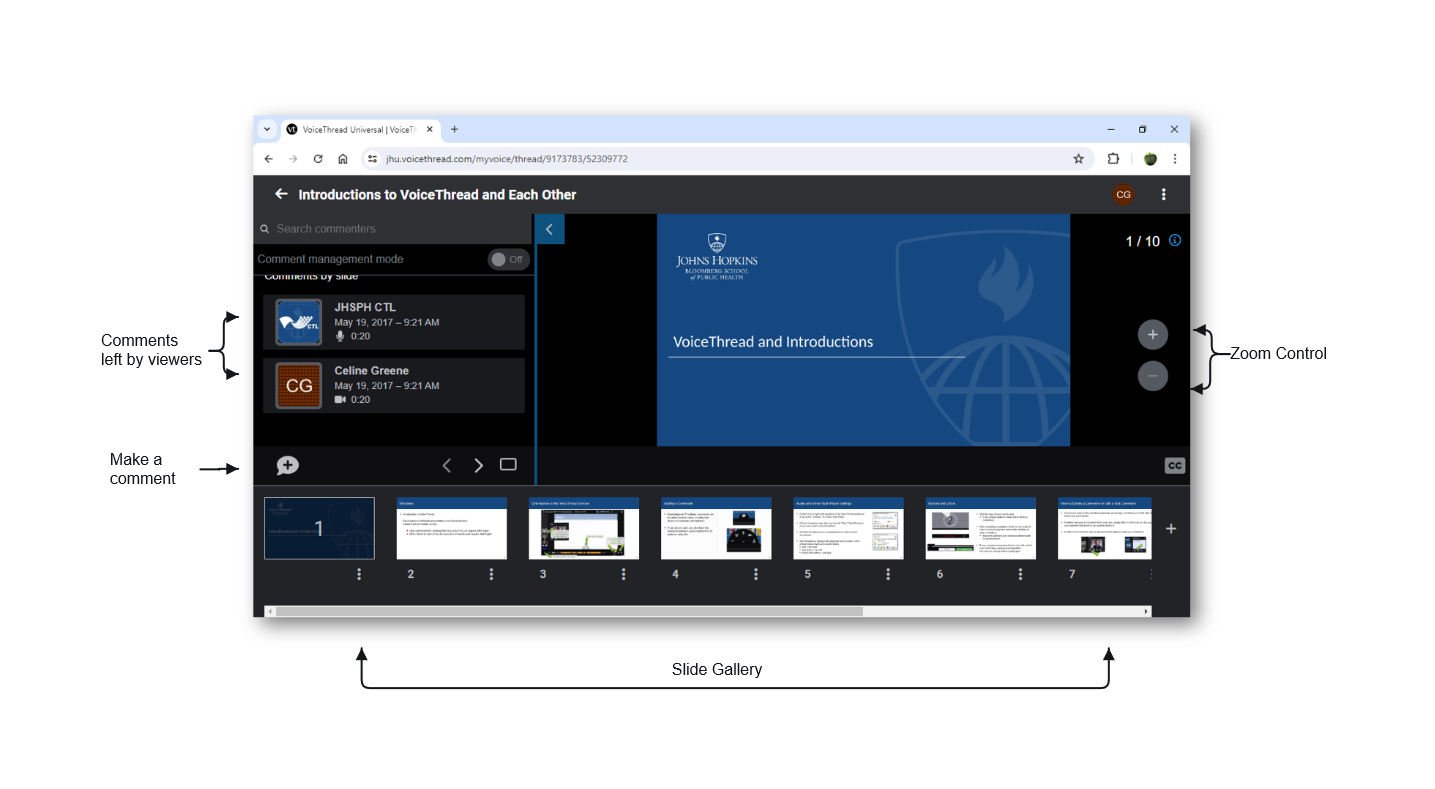
Identity icons (on the left side) indicate comments that have been left by viewers.
Click the Make a Comment button (on the lower left) to leave a comment.
At the bottom of the window, you can navigate to the next or previous slide, or show all slides (Gallery).
You can also zoom in or out using the plus/minus bottoms on the right side of the slide.
Setting Up your Microphone
If you intend to use the audio record feature, you will need a working microphone. Please see the following instructions to set up a microphone on your Mac or Windows.
VoiceThread How-To Documentation
Note that at this time the site has both New VoiceThread (New VT) and Legacy VoiceThread (Legacy VT) instructions. JHU will be using the New VoiceThread in Summer 2024.
Using VoiceThread in a Canvas Course
See https://canvas.jhu.edu/faculty-resources/third-party-tools/third-party-tool-voicethread/
Creating a VoiceThread
See https://voicethread.com/howto/creating-a-new-voicethread-2/ which contains a walkthrough on how to create a VoiceThread.
Adding a Comment to a VoiceThread Presentation
See https://voicethread.com/howto/how-to-comment/.
Editing a VoiceThread
See https://voicethread.com/howto/editing-an-existing-voicethread-2/
Sharing a VoiceThread
Any VoiceThread that you create is private by default. You can then decide who gets to see it and what level of permission they have. You can allow others to view, comment on, or edit your VoiceThreads. These permissions can be granted to specific individuals or to groups of people. You can also revoke sharing permissions at any time so that others can no longer access a shared VoiceThread.
Common ways to share: