Add Authorized User | Edit Authorized User | Delete Authorized User
The five areas you can grant permission for the Authorized User:
Academics (My Class Schedule): The Authorized User will be able to see your current Class Schedule by default, as well as other class schedules from previous terms. The Authorized User can see the schedule by Enrollment Summary or by Weekly Calendar, just as the student would view the schedule.
Academics (My Grades): By default, the Authorized User will see all grades since enrollment at Johns Hopkins. This includes GPA and the number of credits earned.
Billing (Summary, Statements, Bill Pay): Creating an Authorized User with this feature allows the Viewer to view and pay student bills.
Financial Aid (Requirements, Aid Summary, Aid Info, Disbursement Info): The Authorized User is granted access to all of the student’s Financial Aid documents, and can access the documents that are required and/or need to be completed.
J-Card: Authorizes the J-Card office to discuss account and allows access to online card management (view transactions, deposit money, etc.).
Add an Authorized User
- Navigate to the Authorized Users page located under Personal Info
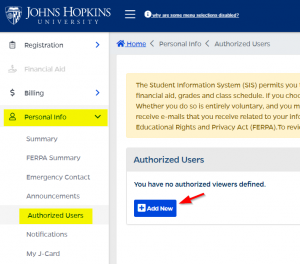
You can also access the Authorized Users page in the menu under Billing - Click the Add New button.
- The Add/Update Authorized User page appears.
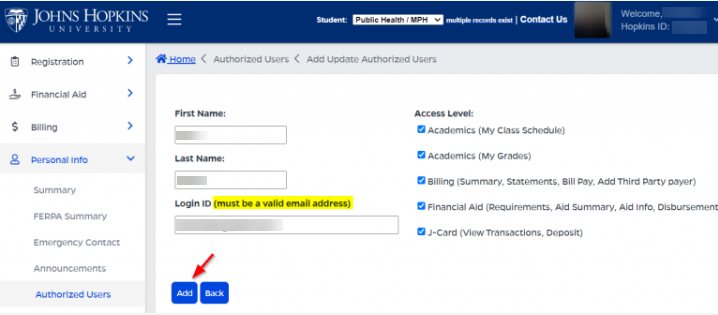
- Enter First Name, Last Name, and Login ID. Use email address for the Login ID.
A personal email address is recommended. Email addresses with “+” sign cannot be used. Some employers and government entities do not allow their email addresses to be used to authenticate to outside systems. For further assistance, submit a request for support at https://support.sis.jhu.edu/case-home via the Records and Registration > JHED options.
- Then select the user’s Access Level. You can edit the access level at any time.
- Enter First Name, Last Name, and Login ID. Use email address for the Login ID.
- Click the Add button to save this user.
- You will be prompted with a confirmation pop-up notifying you that this authorized user will be receiving an email with log in information.
To Edit or Delete an Authorized User
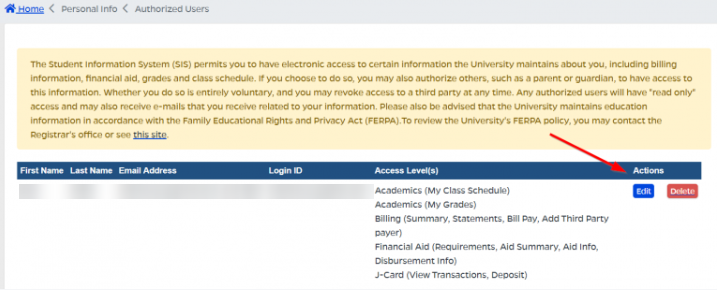
To Edit
- Click the Edit button in the Actions column.
- After making your changes, click the Update button.
- Important Note: Once an authorized user is created, you can only update the first name, last name and access level. You are not able to update the email address since this is used as their login ID. If there is an error with the email address or the authorized user wants to use a different email address, you need to delete the authorized user account and create a new authorized user account. The authorized user will then have to go through the first time log in setup with the new email address before they can log in again.
To Delete
- Click the Delete button in the Actions column.
- A pop-up will appear asking, “Are you sure you want to delete…”
- Click OK to confirm the deletion.