The Zoom Scheduler tool is an extension of the regular Zoom platform. Scheduler allows users to connect their calendars and generate slots of scheduled availability for attendees to then select a preferred time on both parties’ calendars. It makes finding the perfect meeting time easier and streamlines appointment scheduling.
- Accessing Zoom Scheduler
- Connecting your Calendar
- Scheduler Settings
- Using Zoom Scheduler
- FAQ
- Support and Help
Accessing Zoom Scheduler
Zoom Scheduler can be accessed via both the desktop client and web portal.
Desktop Client
- Open and sign into the desktop client, using the following instructions:
- Faculty/Staff: Zoom Desktop Client
- Students: Zoom Desktop Client for Students
- Zoom Scheduler will be located as a menu item in the top navigation bar. You may need to open the More … menu item to locate and open Scheduler.
Web Portal
- Sign into the Zoom web portal, using the following link:
- Faculty/Staff: jh.zoom.us
- Students: jhubluejays.zoom.us
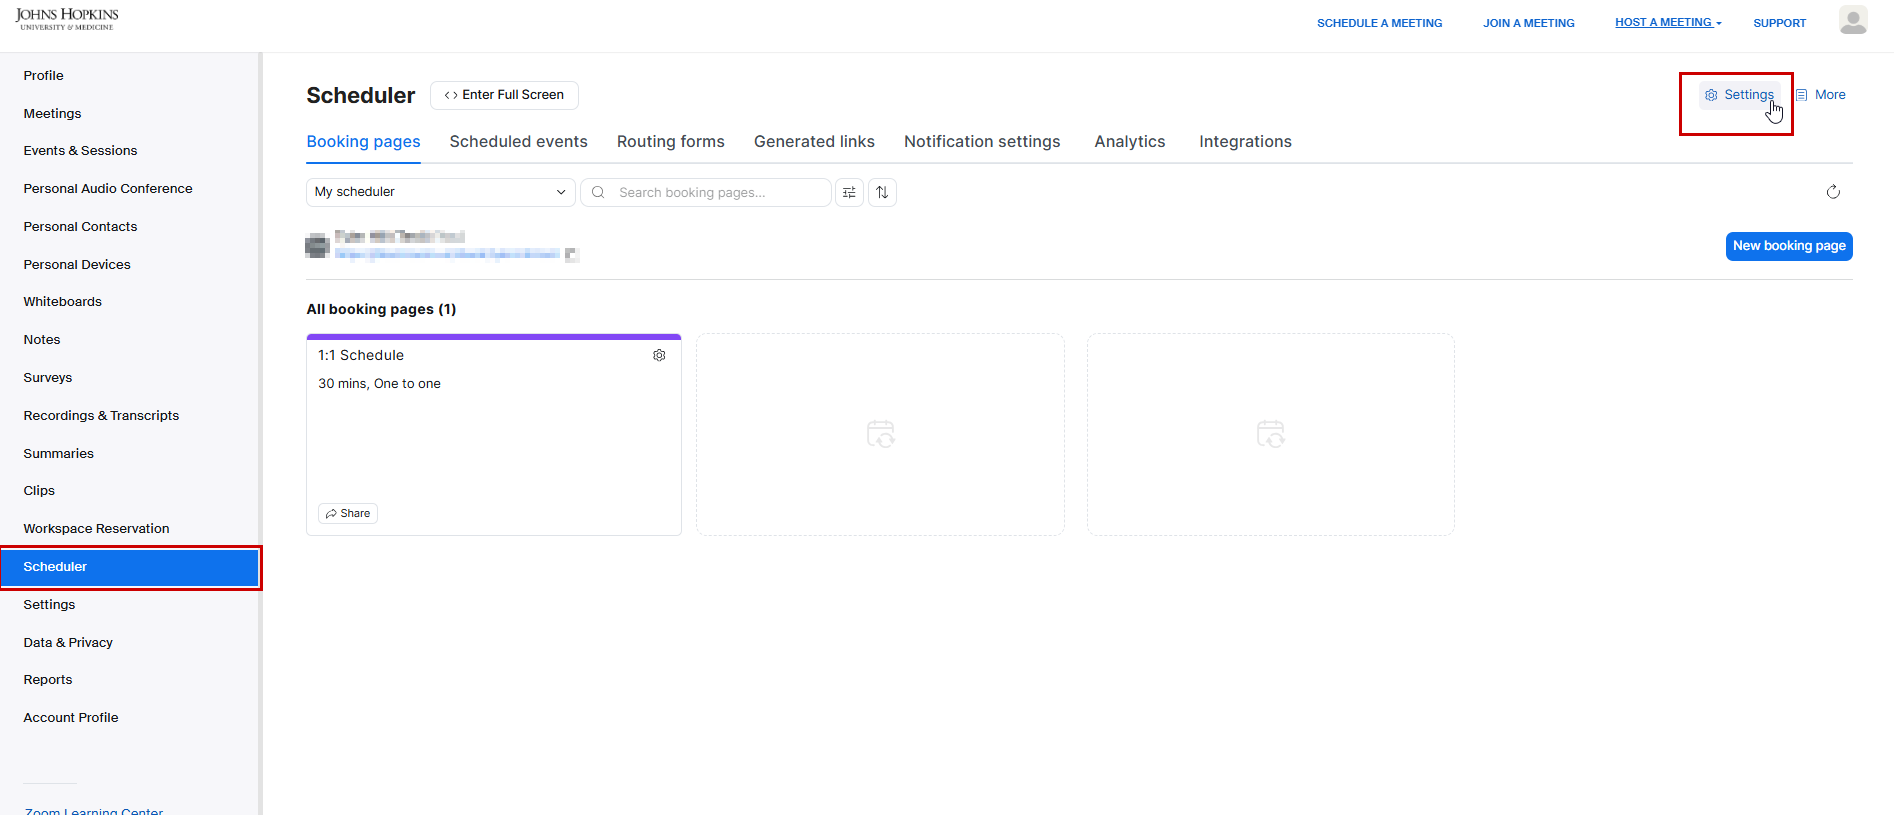
- In the left navigation menu, click Scheduler.
Connecting your Calendar
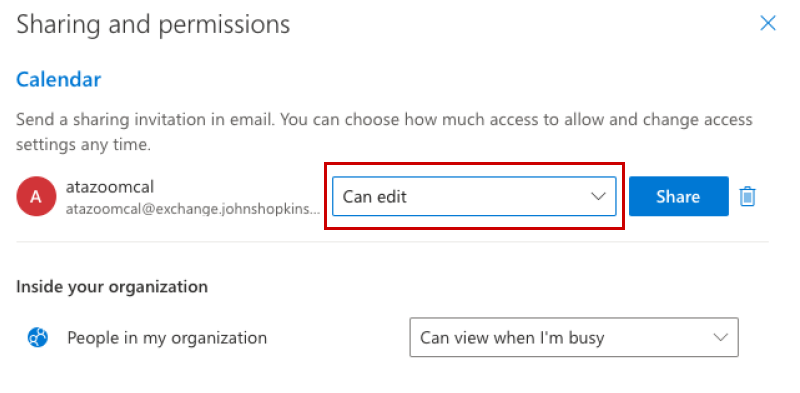
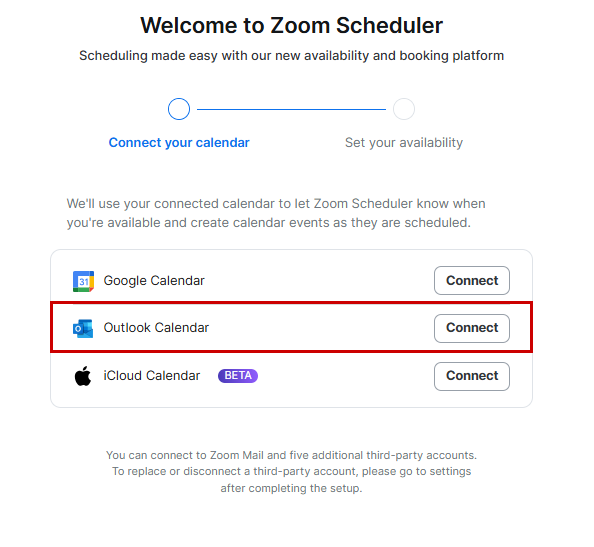
In order for Zoom to check your availability to schedule Zoom meetings, you must connect your to a supported calendar.
- Open Scheduler, via the desktop client or web portal.
- Once open, you will be asked to select which calendar type you’d like to connect. Click Connect next to the Outlook Calendar option.
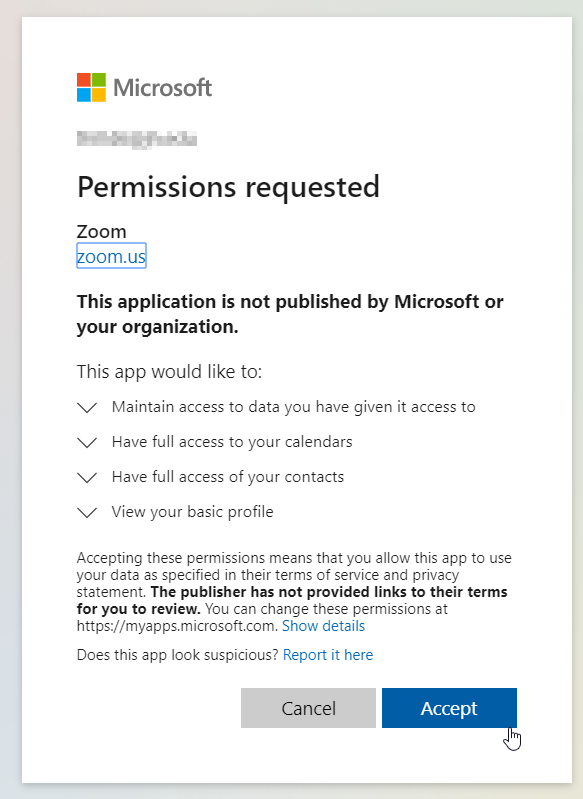
- You will then be directed to the Johns Hopkins Sign in page. Complete the authentication process by entering your JHED username ([email protected]) and password. Click Accept for the Zoom permissions being requested.
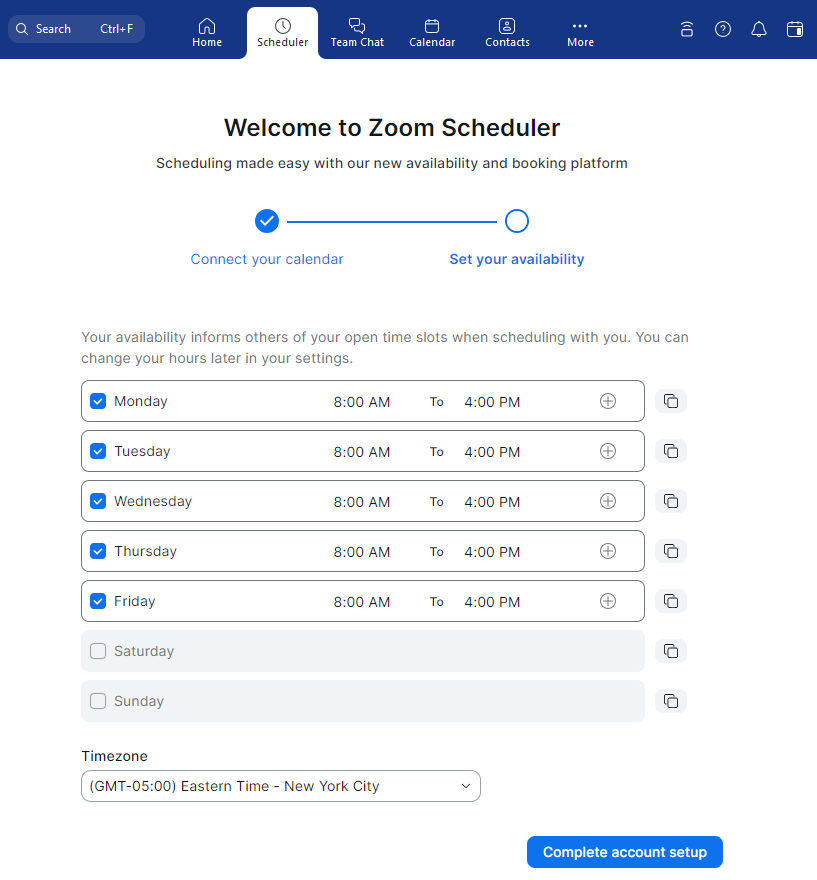
- Once you have successfully authenticated, navigate back to Zoom Scheduler. Before completing the remainder of your account set up, you will be asked to set your availability. Configure your availability accordingly. (Note: This can be later updated and edited, if necessary)
Scheduler Settings
Users can update various settings and configurations within their Scheduler profile. Login at the web portal and navigate to Scheduler > Settings.
Below you will find a list of the settings/configurations you may adjust under each menu tab.
Profile
- Public Page Link
- Notification Email
- Date Format
- Time Format
Accounts
- Users can add additional accounts, reauthorize existing accounts, disconnect accounts, and adjust scheduling conflict settings.
Availability
- Users can modify their original availability schedule, create new schedules, add date overrides, and set their default availability schedule.
- For more detailed instructions, please review Zoom’s support article for Managing the Zoom Scheduler Availability tab.
Branding
- Logo
- Customize Public Booking Page color
Using Zoom Scheduler
In order for clients and other users to view your availability and schedule a time to meet, you must create a booking schedule. Booking schedules can be either recurring or custom. Both schedule types generate booking links, which clients leverage to schedule time.
- Recurring booking schedules repeat until a specific date is reached or they can repeat indefinitely. These schedules leverage the availability previously configured within you profile.
- Custom booking schedules allows organizers to host meetings outside of their regular availability. These schedules will expire after the date of the scheduled time slot(s) and will not be accessible to those which the link was shared with.
Additionally, users will also have a “public” booking page, which you can configure within Settings > Profile. Recurring booking schedules will display on your public booking page, while custom schedules do not. Custom booking links must be shared directly with the users you wish to schedule time with.
We recommend reviewing the following support guides from Zoom which contain information for creating booking schedules, differences between schedule types, sharing schedules, and additional Scheduler resources.
- Create and Manage Booking Schedules
- Sharing your Booking Schedules
- Viewing Scheduled Events
- Comparing Zoom Scheduler Meeting Types
- Zoom Scheduler Resources
FAQ
Q: Is Zoom Scheduler free of charge?
A: Yes, Zoom Scheduler is included, at no additional charge, for all Licensed Zoom accounts in the Johns Hopkins enterprise (including students). Zoom Scheduler is not supported for Basic or free accounts. If you wish to upgrade to the Licensed account, please visit the Zoom Resource Request Form.
Q: Am I required to use Zoom Scheduler?
A: No. Zoom users can continue scheduling meetings as they always have. Zoom Scheduler streamlines appointment scheduling and allows your clients to easily view your availability from a single interface.
Q: How does Zoom Scheduler compare to Calendly?
A: For a comprehensive overview of the differences between Zoom Scheduler and Calendly, please visit Zoom’s support page for Comparing Zoom Scheduler to Calendly. At this time, there are no plans to remove the Calendly approved Zoom integration.
Q: Can I link my calendar to Zoom without using Zoom Scheduler?
A: Yes. Please refer to our support guide for the Desktop Client Calendar Integration.
Q: Does Zoom offer analytics around meetings and appointments scheduled using Zoom Scheduler?
A: Yes. Visit the Analytics tab within Zoom Scheduler.
Q: Can I delegate another user to manage my booking pages/schedules?
A: Yes. Open the settings icon on the booking page you wish to share and click Edit Permissions. From here, you can designate another Licensed user the ability to view and/or edit your booking page.
Support and Help
For technical support needs with the Zoom Events platform, we’d recommend visiting Zoom’s Scheduler Support page. Licensed Zoom users can also fill out a Zoom Web ticket describing the question or issue in detail for a Zoom technical expert.
To get in touch with the Johns Hopkins Zoom support team, please submit a help desk ticket.