The Virtual Desktop (VDI), also known as Hopkins MyCloud, is a virtual desktop (Citrix) thin-client implementation that lets you access pre-installed JH software from your Mac or PC. Zoom, one of the installed applications, offers similar features and functionality when compared to both the desktop and web clients.
- Accessing Zoom Application in MyCloud
- Logging into Zoom VDI
- Audio and Video Setup
- Limitations
- Still Need Help?
Accessing Zoom Application in MyCloud
-
- For getting started with the MyCloud Desktop, please refer to the IT Services documentation on Getting connected to Hopkins MyCloud Desktop.
- Once you have logged into the virtual desktop, click the Hopkins Applications folder.
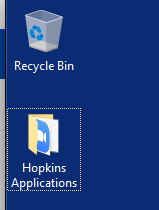
- Then select Zoom VDI.
Logging into Zoom VDI
-
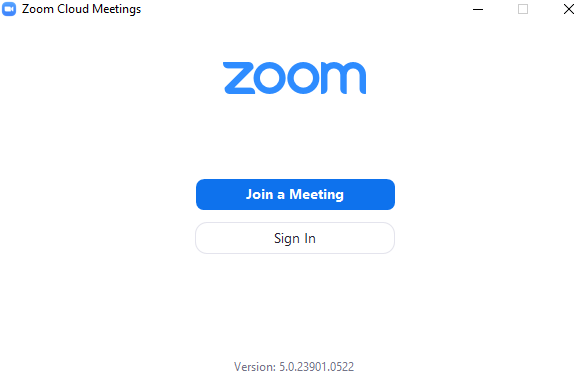
- Once the Zoom VDI has opened, you will need to sign into your account. Click Sign In.
-
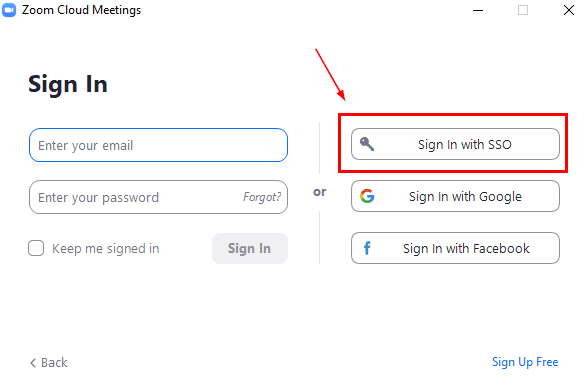
- Then select Sign In with SSO.
- Enter jh for the company domain (no quotes, spaces, etc.) and click Continue.
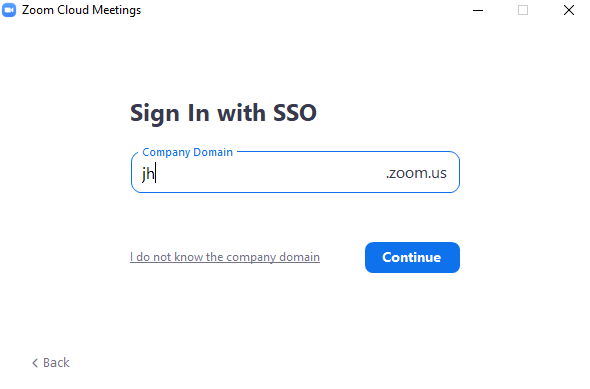
- A new web browser will open and you will be redirected to the enterprise authentication page. Please login using your JHED credentials to finish signing in.
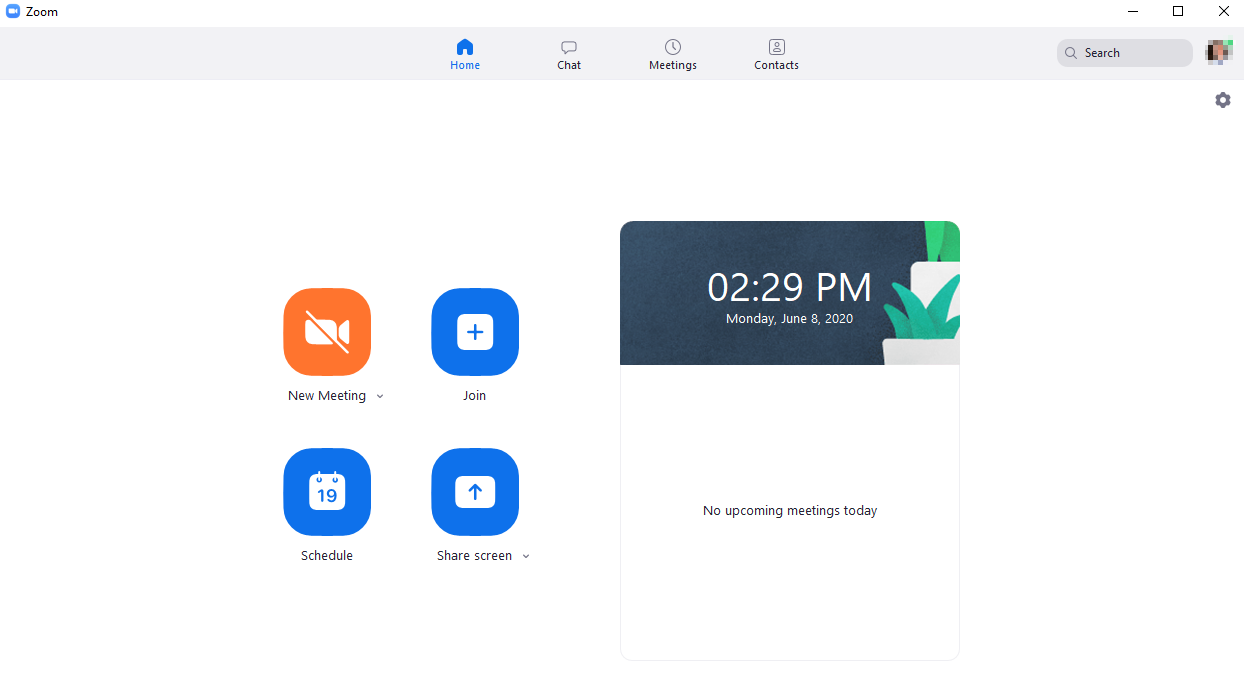
- Upon successful authentication, the Zoom VDI client will load the Home screen.
Audio and Video Setup
To ensure that you can properly present your video and hear and speak to your participants, you must allow the Citrix receiver to access your local devices and configure them accordingly.
Windows
Allowing Citrix Receiver to Access your Local Devices (Windows)
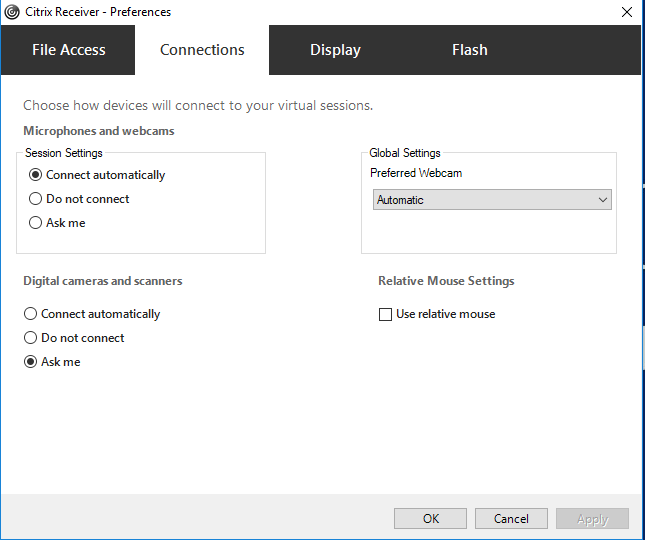
- Click the Preferences button on the Citrix toolbar located at the top of your screen.

- Under the Connections tab, you will see options for Microphones and Webcams; here you can select whether you want to connect automatically or “Ask Me”, so that anytime an external device is being used, you can give permission to the application/VDI to access it.
Configuring Audio and Microphones from Windows Home Screen
-
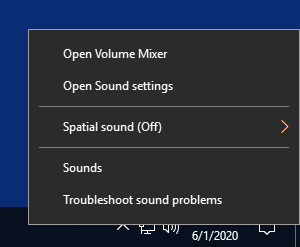
- Right click the Speaker/Volume icon in the lower right corner of the screen.

-
- Select Open Sound Settings.
-
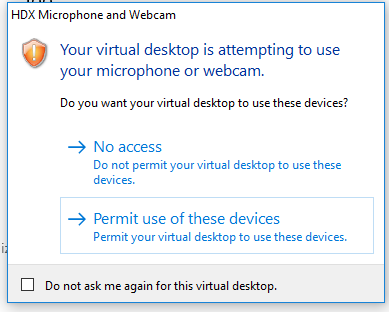
- If you are prompted with the screen below (which you should be if you selected “Ask Me” in the previous step), ensure that you select Permit use of these devices.
-
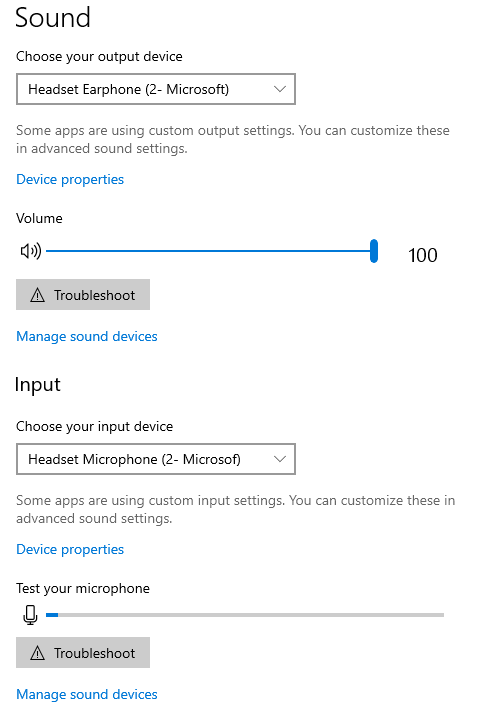
- From here, you can select your preferred sound and microphone options.
Configuring Audio and Microphone from Zoom Settings
-
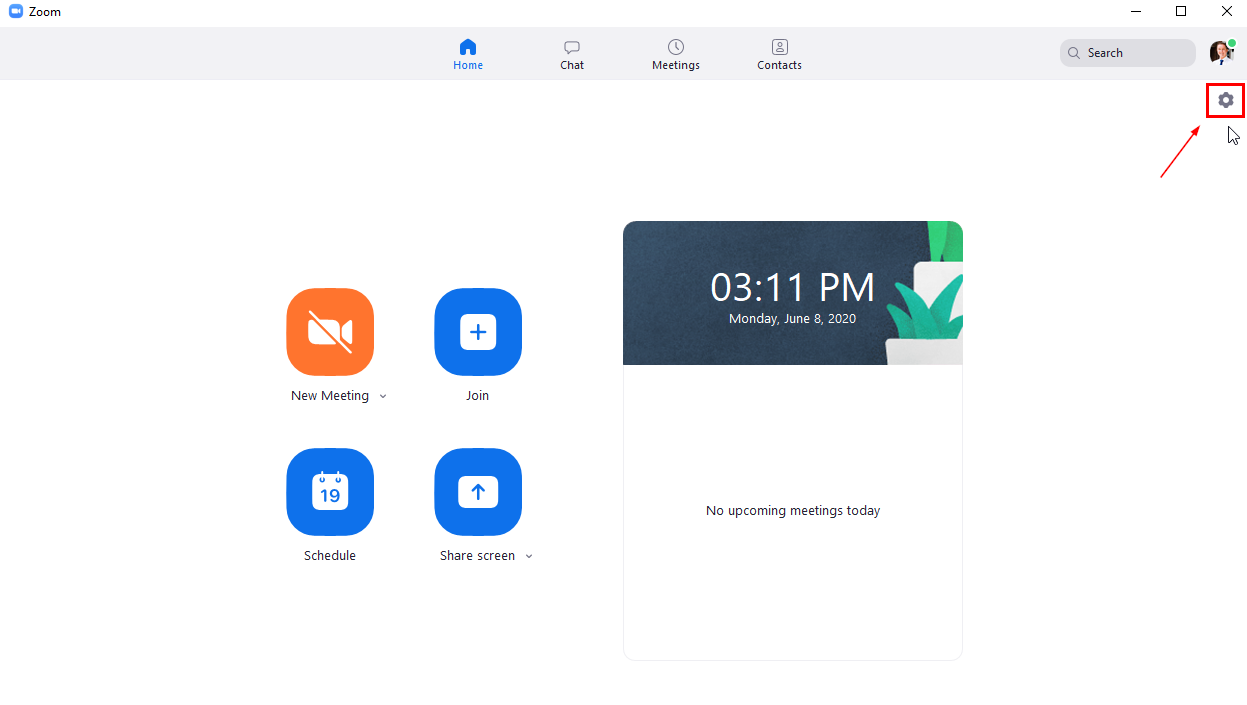
- Once signed into the Zoom VDI, click the Settings icon in the top right corner.
-
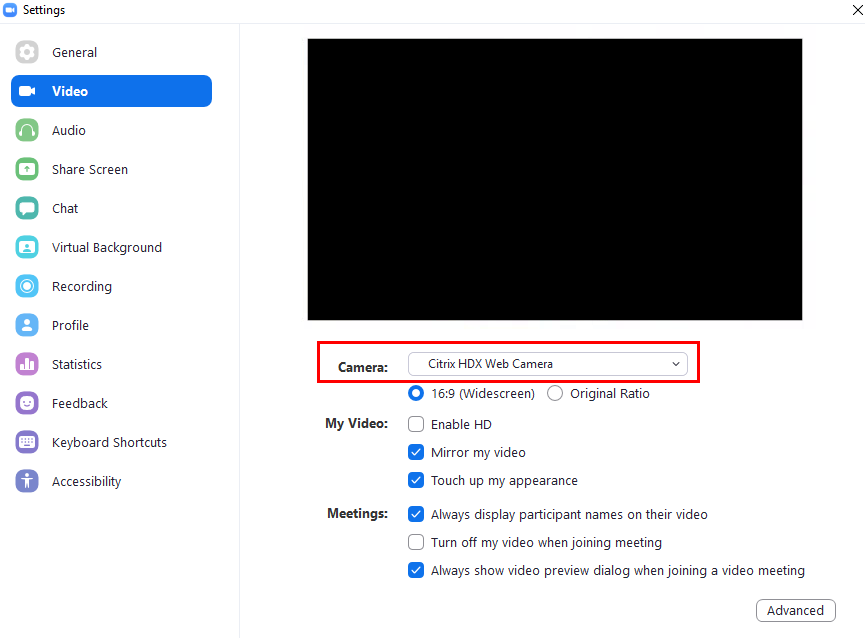
- Then, select Video.
- Select Citrix HDX Web Camera or the applicable web camera.
-
-
- If you are prompted with the screen below (which you should be if you selected “Ask Me” in the previous step), ensure that you select Permit use of these devices.
-
-
- To configure audio, select the Audio tab.

- From here, you will have the ability to select your speaker output and microphone, as well as test them.
Mac OS X
Allowing Citrix Receiver to Access your Local Devices (Mac)
-
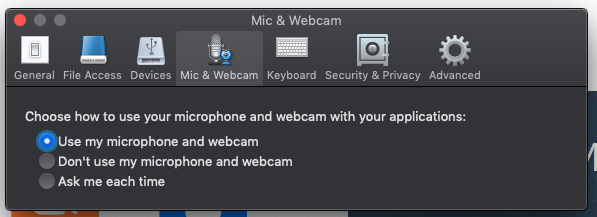
- Go to Citrix > Preferences > Mic & Webcam.
- Select Use my microphone and webcam.
Please note: For OS X 10.14 or later, you also need to ensure Citrix Viewer has permissions to access your Camera and Microphone.
-
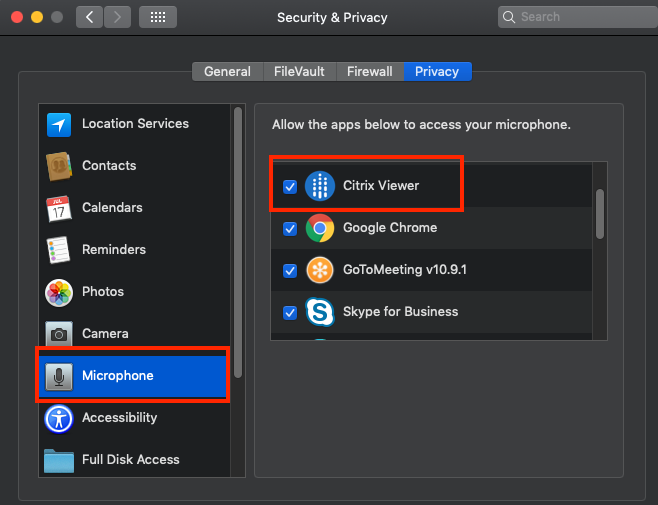
- Go to System Preferences > Security and Privacy > Privacy.
- Choose Camera, and make sure the Citrix Viewer application is allowed to access your camera.

-
- Choose Microphone, and make sure the Citrix Viewer application is allowed to access your microphone.
Limitations
There are known functionality limitations between the Zoom desktop client and the version available within MyCloud Desktop. For example, blurred or background pictures are not supported.
For a list of MyCloud Desktop Zoom limitations, check out the knowledge base article Audio and Video Best Practices (note: link requires JH Authentication). Within the article, there are resources available that outline the limitations.
Still Need Help?
If you are still unable to successfully set up your audio and video for Zoom after viewing this guide, please contact the VDI team by visiting Support Assistance for Hopkins MyCloud Desktop.