Zoom’s Automated Captioning feature (also known as Live Transcription) automatically transcribes the audio and speech from a Zoom meeting or webinar to text for participants to view during the session. If this feature is enabled on the host’s Zoom account, meeting/webinar participants can choose whether they wish to view the captions in the session.
- Enabling/Disabling Automated Captions in User Settings
- HIPAA Guidelines for JHM, JHUSON, and JHUSOM Users
- Using Automated Captions
- Typed Closed Captioning
- FAQ for Automated Captions
Enabling/Disabling Automated Captions in User Settings
-
- Login to Zoom at the web.
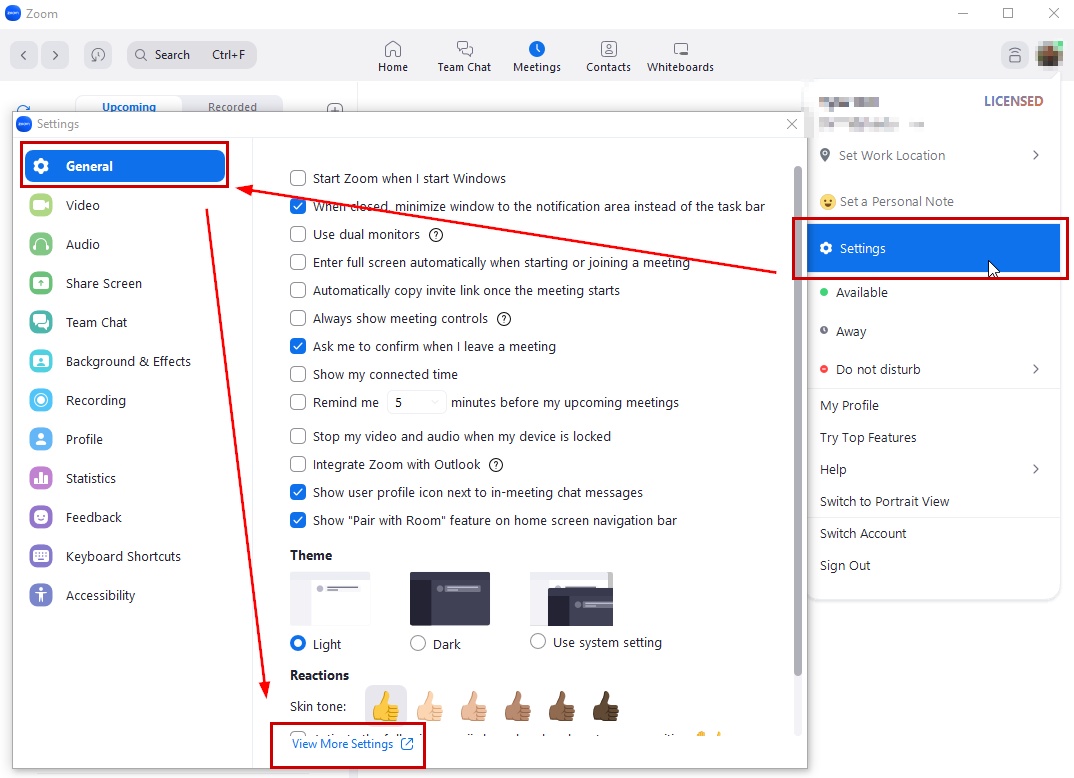
- From the desktop client, click the Settings icon > General > View More Settings, which will re-direct you to the web.
- Login to Zoom at the web.
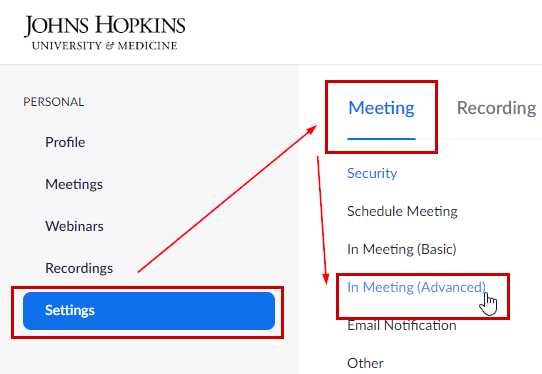
- Navigate to Settings > Meeting > In Meeting (Advanced).
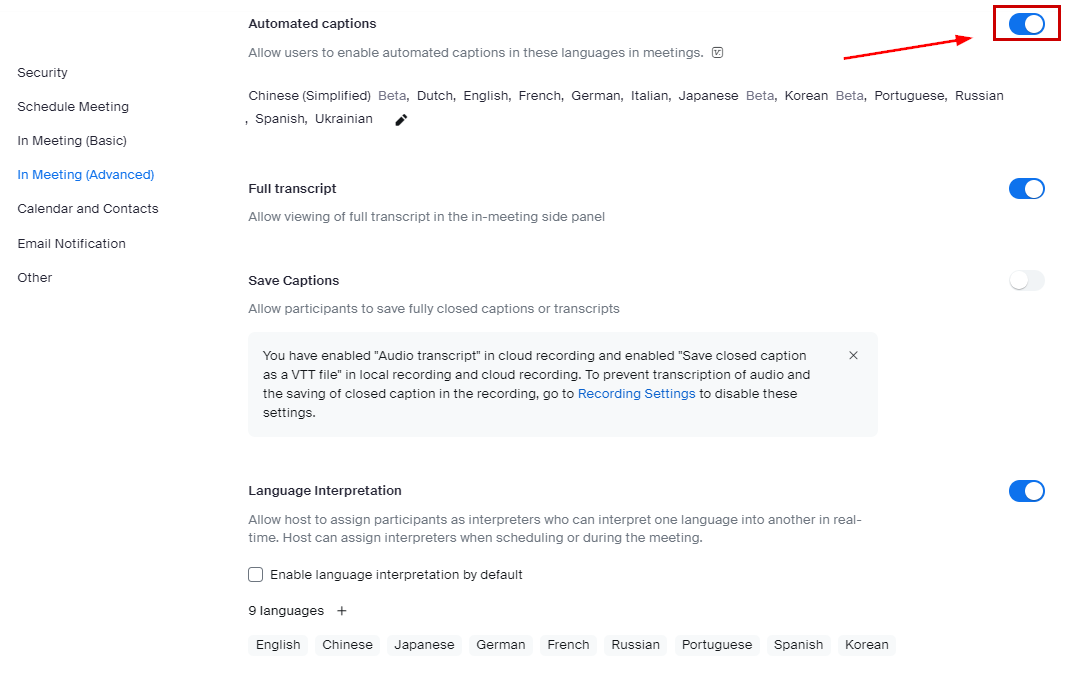
- Scroll to Automated captions.
-
- Enable Automated captions by clicking the toggle so it is marked Blue. To disable Automated captions, click the toggle again until it is marked Gray.
- Review and enable the additional options below Automated Captions as necessary.
-
- To save a copy of transcript as the host (without recording the session) or as a participant, enable Save Captions.

– Please Note: If this setting is enabled, participants will also have the ability to save a copy of the transcript. This setting enables the saving functionality for both the host and participants.
HIPAA Guidelines for JHM, JHUSON, and JHUSOM Users
While you do have access to utilize the Automated Captions feature, there are a few restrictions to ensure HIPAA-compliance.
The Save Captions setting will be disabled and locked by admin to ensure that meeting participants cannot save their own copy of the transcript:
– Please Note: If you are recording the session locally (as the host or as a participant), a copy of the transcript (.txt file) will be included in the same folder as the recording. If there are no other participants in the session with you, no copy will be provided.
Using Automated Captions
-
- Start your Zoom meeting or webinar.
- Click Show Captions from your Zoom toolbar at the bottom of the screen.
- With the automated captions enabled and running, you will see captions displayed as subtitles on the bottom of your screen. – Please Note: If you are recording the session locally, subtitles will not be included. If you are recording to the Cloud, subtitles will be included when viewing the recording at the web, but not with the downloaded recording.

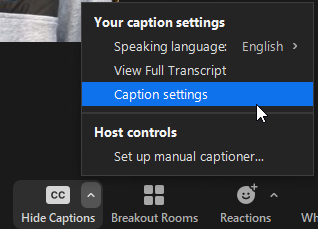
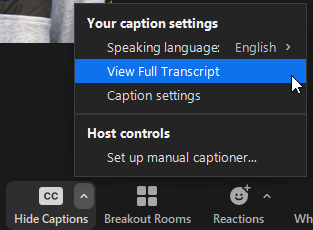
- To view the full transcript, click the caret (^) above Hide Captions and select View Full Transcript.
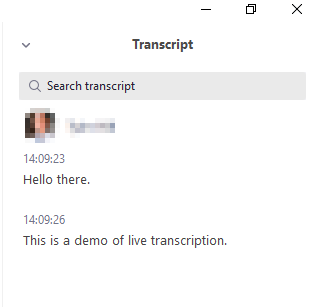
- To save a copy of the transcript without recording the session, you will need the Save Captions setting enabled above.
-
- Click Save Transcript at the bottom of the transcript window.

– Please Note: If you are recording the session (as the host or as a participant), a copy of the transcript (.txt file) will be included in the same folder as the recording. If there are no other participants in the session with you, no copy will be provided. -
- To stop viewing the subtitles/captions, click the Hide Captions button.

– Please Note: You will only see the transcript from the point in which you joined the Zoom meeting or webinar and will not be able to see any prior transcription or captions.
Typed Closed Captioning
In addition to Automated Captions, Zoom also offers the ability for the host to assign a designated “closed captioner”. This meeting attendee is then responsible for manually typing/entering the captions as the session progresses. For more details, please visit Zoom’s Managing and viewing closed captioning page.
Please note the following:
- When using both Automated Captions and manually-entered closed captions while recording locally, the transcript will include both in the same file.
- When recording to the Cloud with manually-entered closed captions, these will be displayed as subtitles when viewing the recording from the web, but will not be included with the downloaded recording.
FAQ for Automated Captions
Please visit our Zoom FAQ page.

